When we built our house in 2006 we were so grateful to get anything that we did not upgrade very many things. Concerned about money we took what they gave us and ran with it. Of course we love our home but I also like customizing it. We love our cabinets but so do our other neighbors which is why we all chose these when we built. So our kitchen was not unique at all. It looked like at least three of our neighbors kitchens. I have always thought the huge vault in our kitchen needed something more. So I have always wanted to stagger my cabinets but was intimidated by the thought. Well after throwing the idea around with a friend who is also a DIYer she and I were convinced I could do it and it would be fairly easy. Then I started thinking about painting my existing crown molding black. To add depth and character. Then I remembered a tutorial I had read about bulking up existing cabinet crown molding. DING! DING! My idea was born. (ALL PICTURES ARE IPHONE PICS SO QUALITY REFLECTS THAT)
This is the existing cabinets. Straight across with crown molding. Not bad. I mean by most standards this is very nice. Like I said I love my cabinets so I just wanted some character.


First step, unscrew one cabinet at a time and move up to desired measurement. Super easy only two screws in the wall and one between each cabinet. Notice the microwave and above cabinet were last to raise because felt like I better have hubby home to help with the muscle.
Microwave and above cabinet moved up. So happy with the increased space between stove and microwave now! Feel like I increased square footage.

This is the tutorial I was talking about that gave me the idea....http://nestnestingnested.blogspot.com/2011/03/mouldings-easy-how-to.html
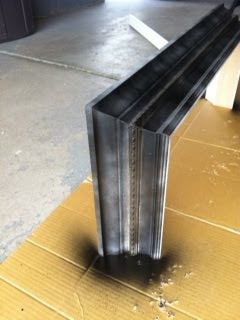
Went to work measuring and building my new bulked up crown molding. I used a base molding flipped upside down as the bottom portion. Crown molding as the top portion. Then a strip of decorative molding as the center strip. Nail gun and wood glue.
Decorative strip....

Finished...now to paint.

Spray painted the first one. Then distressed the decorative strip and added some glaze to the strip to give it an aged look and to add depth. Quickly decided I did not like the spray paint inconsistency so I brushed on new paint and painted the other two by hand also.
I added a 1x2 strip to the top/front of the cabinets to just have a more secure tight fit for the new crown molding. This I think was not a necessary step as I opted not to for the last cabinet and it seems fine.

Middle one IN!!!!!
Was so excited with how awesome it was turning out!!!
Second one in!!!!
Another view....

This corner one was more tricky cutting the crown and base because of the angles. It took me a few tries but then I figured it out.
Since this last pic was taken I have finished the faux finish underneath the cabinets. Started to redecorate above the cabinets and cleared off above my fridge (YIKES) looks bad I know. I need to add the original crown to the two lower cabinets now and it is done. Unfortunately the heat hit before I could finish and I will not but cutting crown molding in my garage in 95degree heat. So it will have to wait.
What do you think???
What do you think???


4 comments:
Love it! You're so talented.
I've seen it in person and it's awesome. I can't believe how handy you are with the tools…it's amazing!
I love the update and think u are the SHIZ!
You're so goo at that! Impressed with your patience! Great job!
Post a Comment